PICK YOUR AI THEME TO GET STARTED
FILES GUIDE
MOBLE CMS makes light work of uploading files and images to your website. Here you can discover some essential tips that you should know; to help you along your way to ensure that your web pages look amazing and loads quickly.
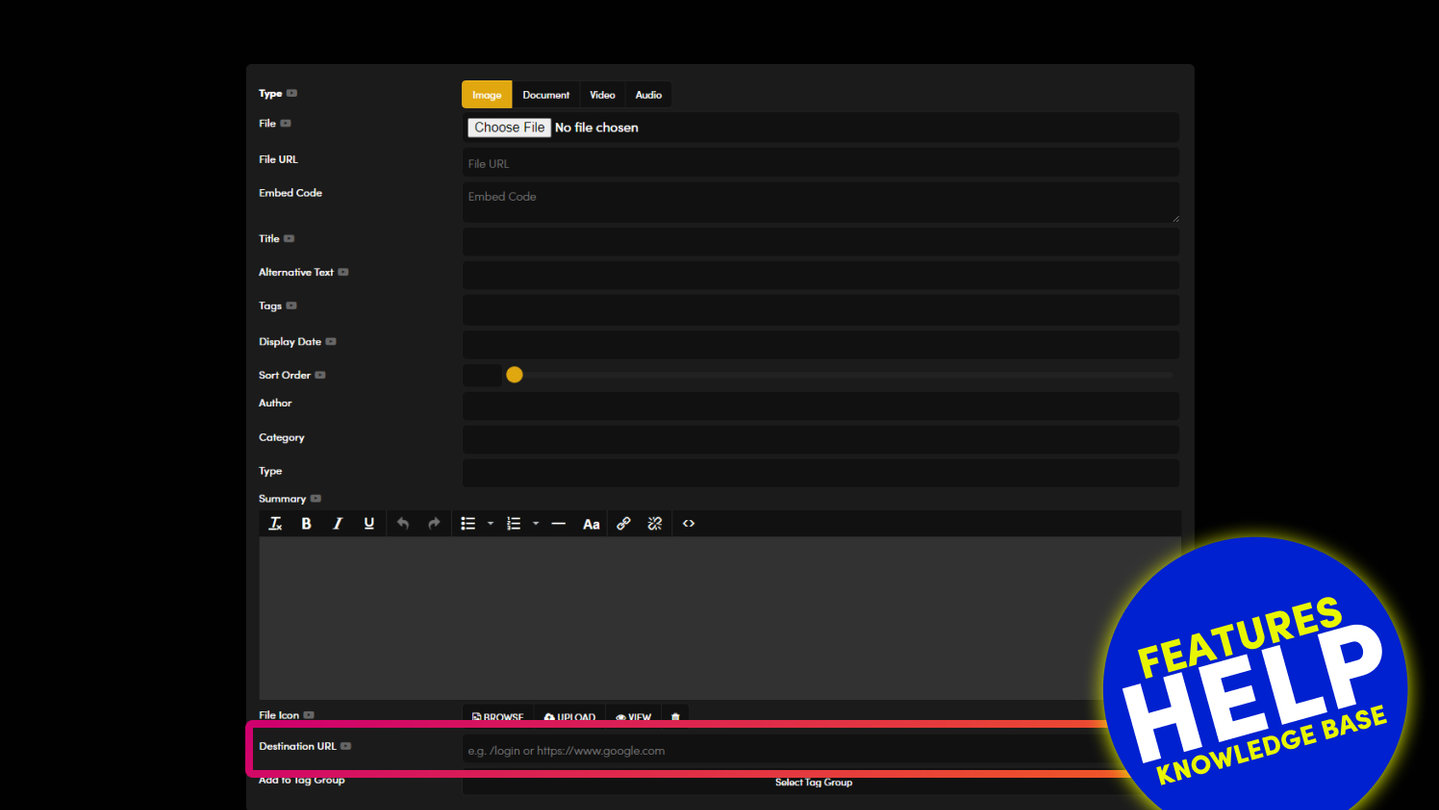
FILE UPLOAD
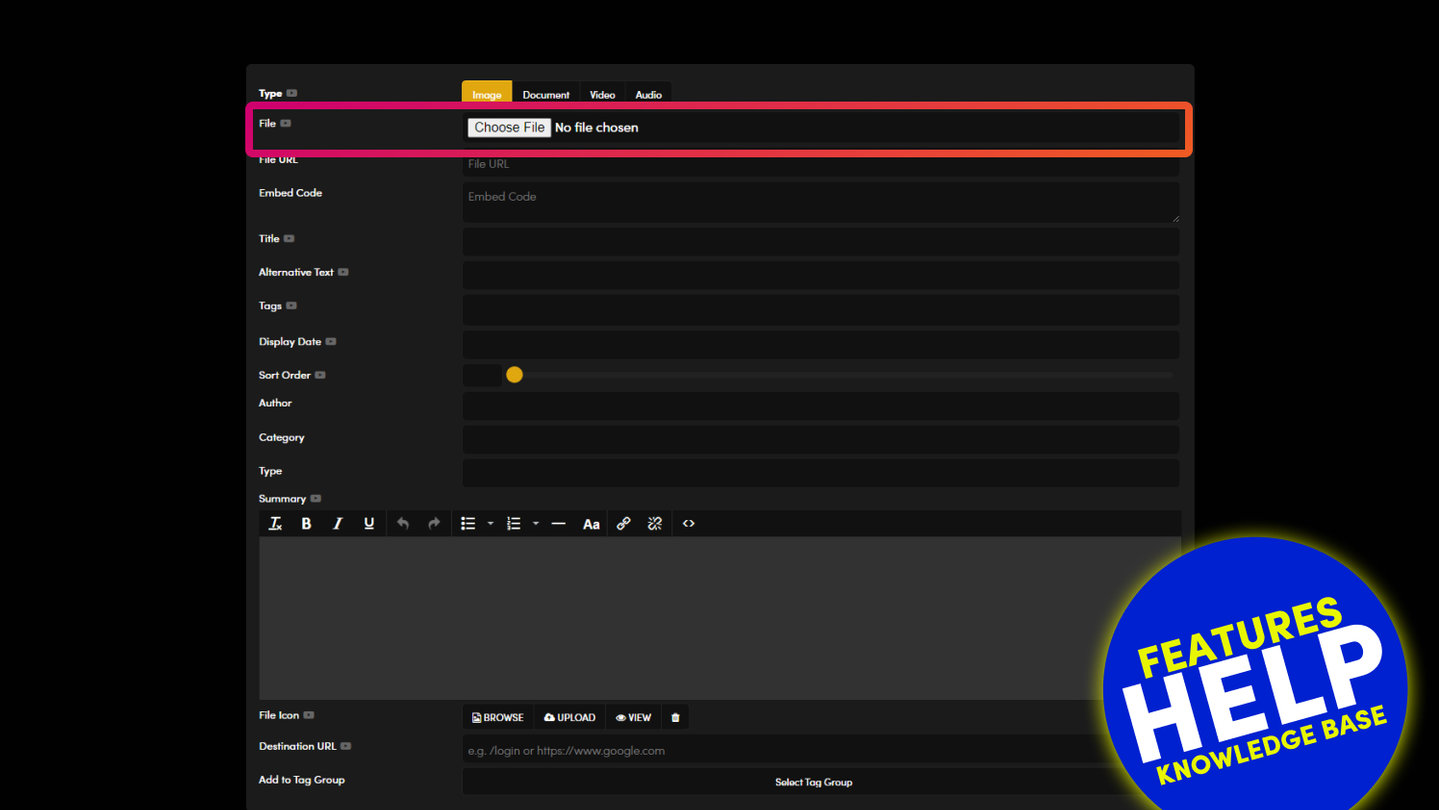
Click 'Chose File' to browse your computer to upload files.
You may upload files with the following extensions: jpg, jpeg, png, tiff, pdf, doc,docx, xls,xlsx, ppt, pptx, txt, rtf, pages, numbers, key, mp4, mov, qt, wmv, avi
You may upload one file at a time. To upload more than one file at once read more below.
UPLOAD IMAGES IN BULK TO MOBLE CMS
MOBLE CMS allows you to import images in the 'Files' area. You have the option to import images individually or in bulk.
You can upload in bulk by following the steps below:
- Browse your computer and place all of the images that you would like to upload into a folder.
- Compress the folder as a .zip file:
- PC: Press and hold (or right-click) the file or folder, select (or point to) Send to, and then select Compressed (zipped) folder. A new zipped folder is created in the same location.
- Mac: Right mouse click and select "Compress Folder Name". A new zipped folder is created in the same location.
- Rename the zipped folder to: import_files.zip.
- Go to MOBLE CMS.
- Go to the 'Files' area from the Main Menu.
- In the top right hand corner click 'Add File'.
- Choose the zip file named import_files.zip.
- Set the file 'Type' to 'Image'.
- Add any other information you would like to assign to all of the images, alternatively you can later add information for each image individually.
- E.g. Create new Tags for the images and/or select from the existing list of Tags.
- Click 'Save' in the top right, your images will now start to upload.
- Depending on the size of your file, uploading images in bulk might take some time. Wait until the file has finished uploading. Do not close your browser.
- Once uploaded, your images will now appear in the 'Files' area. You may now edit images individually, should you wish to.

FILE TITLE
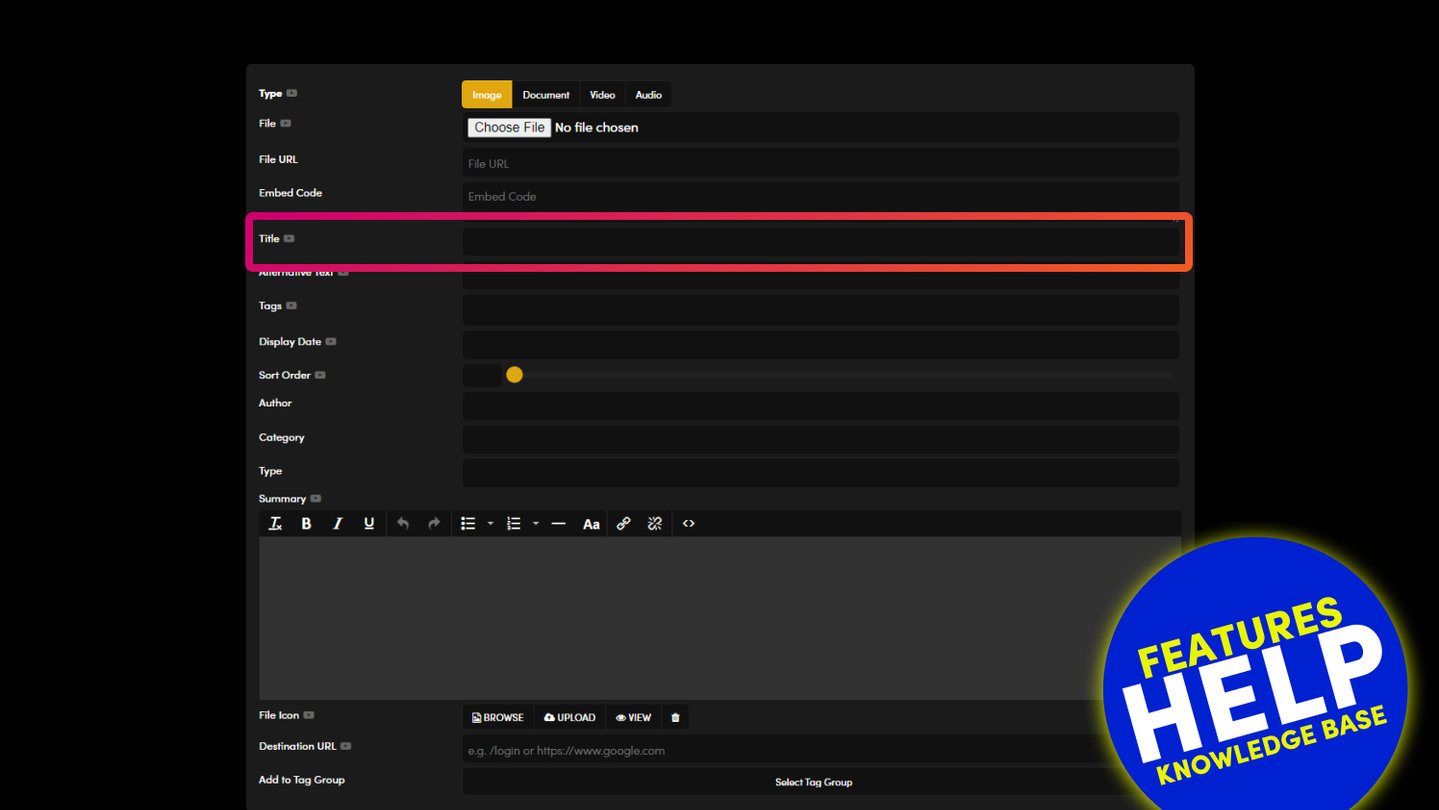
It is important to give your image a title. The title is simply a name that you may give to your file.
The name helps you identify your files for effective content management, though it also plays a specific role in various places around your website:
- In image widgets (such as photo galleries) the Title may appear in the widget feed or list.
- In document widgets (such as photo galleries) the Title may appear in the widget feed or list.
- In multi media widgets (such as photo galleries) the Title may appear in the widget feed or list.
- When browsing images in the CMS the image Title helps you identify the image quickly.
- When browsing files in the Link Lists (e.g. found in the page text component, image component, button component) the image Title helps you to identify the image quickly.
It is important that your titles help both you and your website visitors define your files. Therefore, make sure the image name is short and succinct and be conscious that your titles may be viewed by your visitors.

FILE TYPE
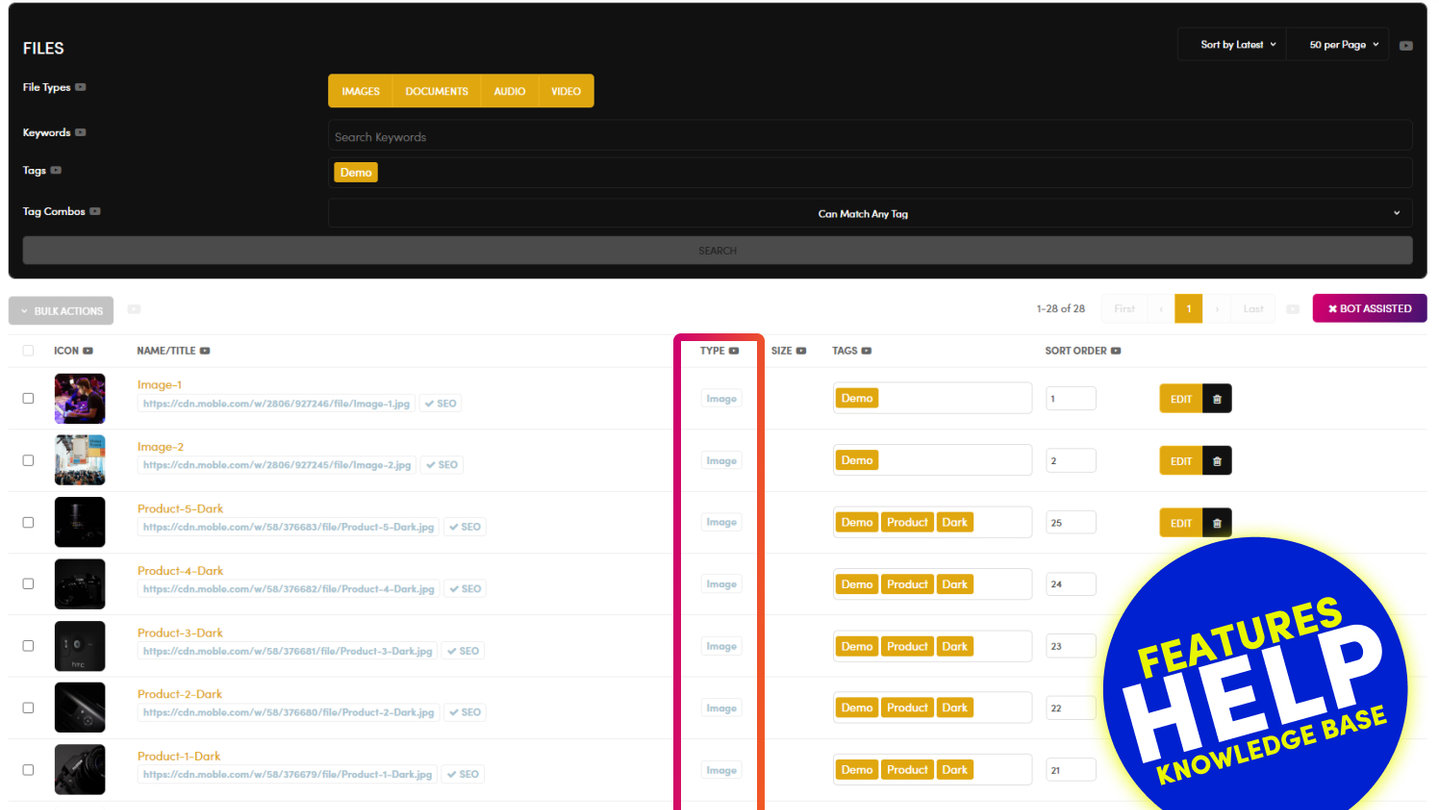
It is important to tag your file with the appropriate 'Type'.
Once a 'Type' is assigned you can filter by the file type in various locations are the CMS, including:
- When searching for files in the main Files area, you may filter by 'File Type'.
- When searching for files in the main Tags area, you may filter by 'File Type'
- When assigning items to a widget you may chose different types of file types.
EXAMPLE:
You decide to assign files to an Image Gallery widget, as follows:
- In the page editor you add a widget to the page, the widget component then pop ups
- You select Gallery from the 'Widget Type' option, you then select 'Image' from the 'Type's option.
- You may now chose 'Tags' for your images, images with those tags will then appear in your new Gallery widget.

TAGS
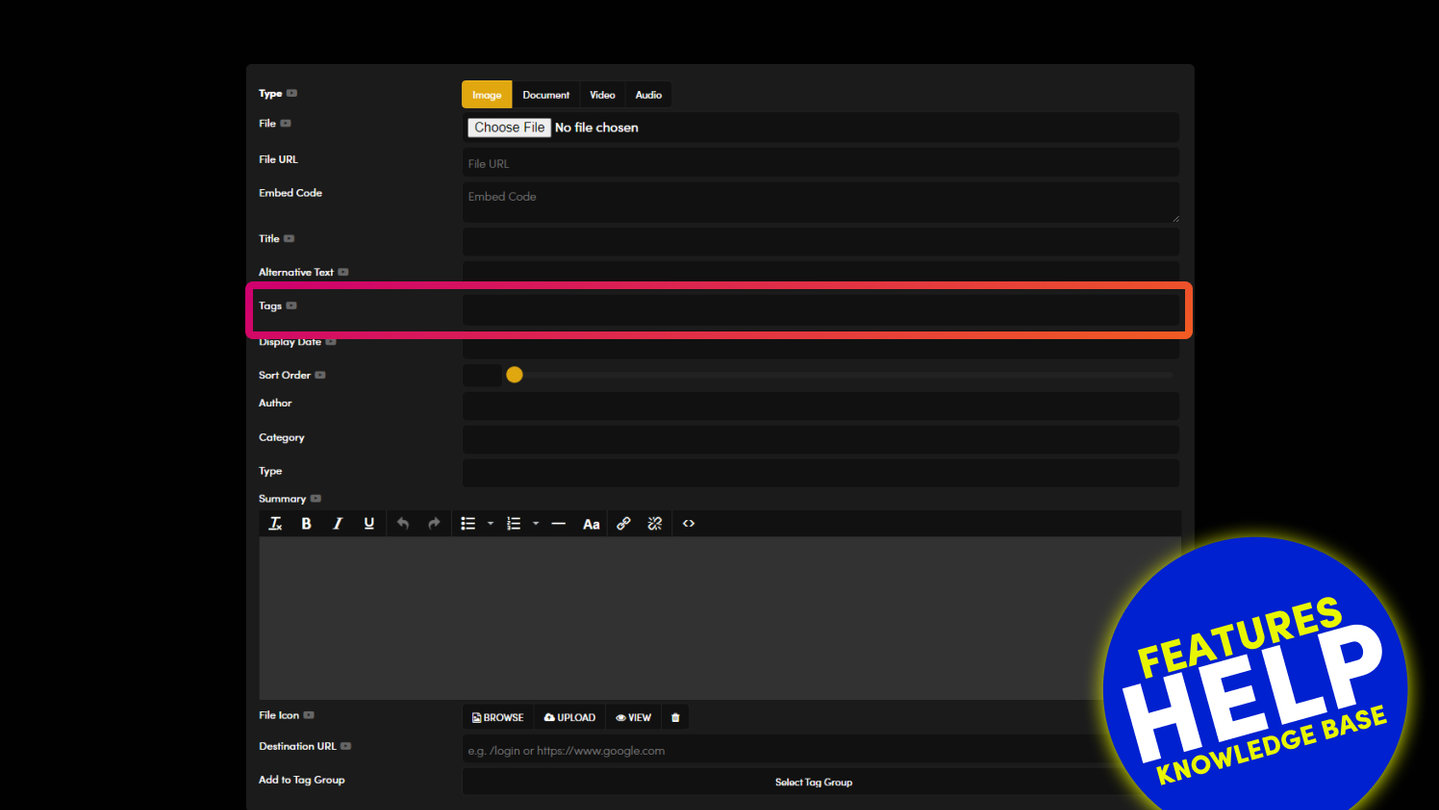
Tags are an amazing way to group files on your website. In any files Widget (e.g. Gallery or Documents) you can choose which tags you want to show.
Simply add the 'Tags' that you require for each file here. Tags that you have already created will appear as you start typing.
You can also manage tags in bulk in the 'Tags' section.
TIP:
It is always best to be as granular as possible when tagging. For example:
Blue Jeans should be two tags, 'Blue' and 'Jeans' not 'Blue Jeans'
This makes for flexible widget management, both now and in the future. For example, your widget might show Blue Jeans today, however, in the future you might want it to show all blue clothing, or jeans of all colours. Therefore, it might also be an idea to apply tags for the categories that the file falls within, for example:
'Blue', 'Jeans', 'Colours', 'Clothing'
If you remain granular it makes it easy to swap and change tag combinations on the fly.

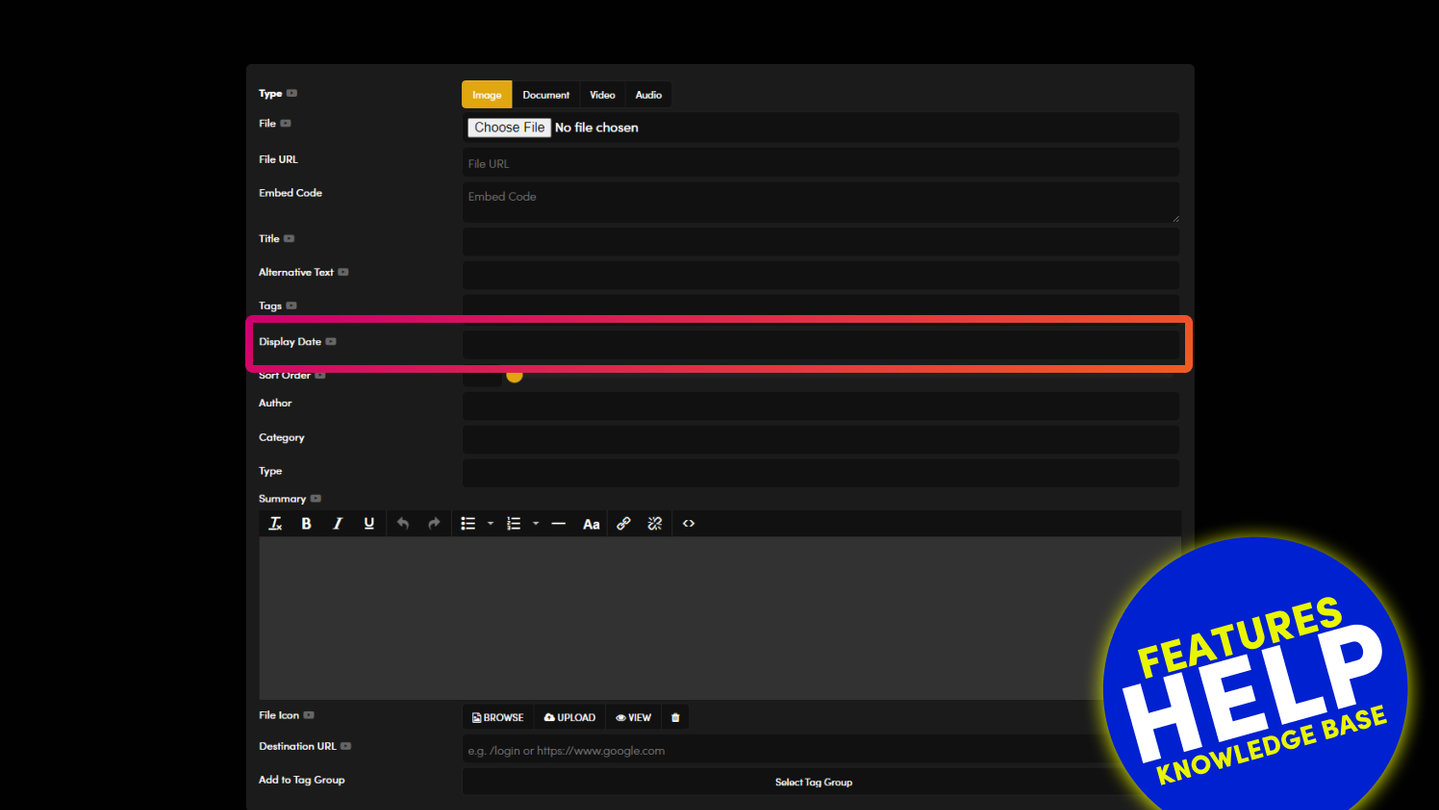
DISPLAY DATE
'Display Date' is an important attribute that let's your website visitors know the relevant date of a particular file. 'Display Date' does not necessarily have to be the date that the file was created or published (i.e. it is not the 'Publish Date').
EXAMPLES:
- You are uploading a batch of images that you took over a year ago, you wish for your visitors to see the date that the photo was taken. You can apply a Display Date so that the images within widgets can now be sorted by the Display Date and not by the date that they were uploaded to the website.
WIDGET SORTING:
Display Date is used as a key sorting feature in your widgets. Display Date can be used to display files in chronological order. You will see the following sorting options within widgets:
Display Date: Displays files with the oldest display date at the top of the list. This is often used to sort Images or Documents that have a display date set in the Files settings.
Display Date Latest: Displays files with the latest display date at the top of the list. This is often used to sortImages or Documents, that have a display date set in theFiles settings.

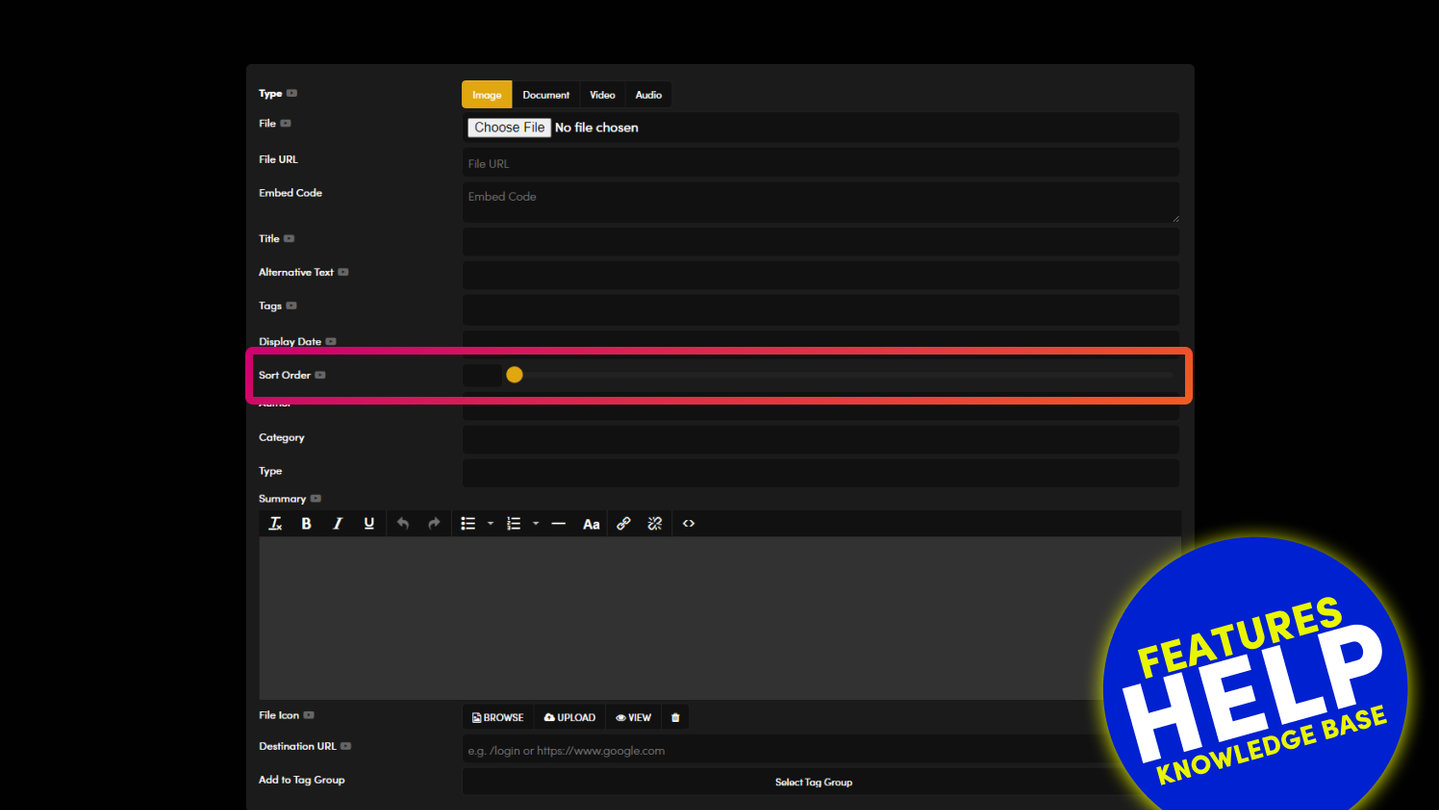
SORT ORDER
Sort Order allows you to prioritise your files in the order of which you would like them to appear in Widgets.
Lowest is sorted at the top.
In the CMS Files area you can also sort your files by sort order to help you manage your images more efficiently.

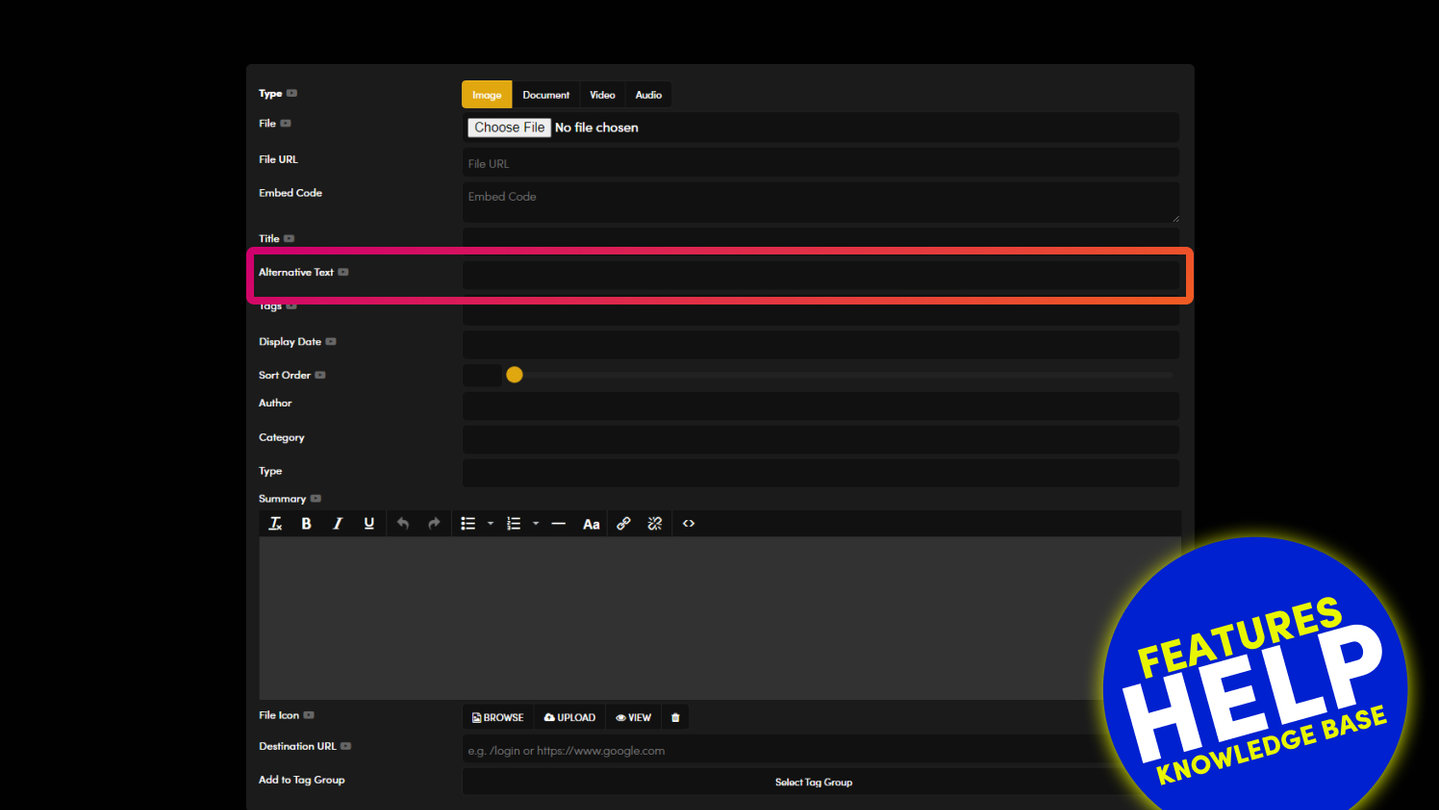
ALTERNATIVE TEXT
The Alternative Text is often referred to as the 'Alt Tag', even though it is not actually a tag. The Alternative Text is used to describe the image when the image is not displayed, e.g. in slow internet connections, to visually impaired using screen readers and also by search engines to understand the image.
Therefore, it is important to be succinct and descriptive. In considering Search Engine Optimisation do not try to keyword stuff your Alt Text. The search engines understand semantics, therefore they will value similar words to your main keyword that you are optimising for. Be as natural as possible and do not repeat your Alt Text for different images.
While there is no limit to the length of your Alt Text, it is recommended that you aim for 125 characters or fewer. This is less because of the search engines, but more because of restrictions within the popular JAWS screen reader. Many versions of JAWS will break up text into blocks of 125 characters.
TIP:
Be as descriptive as possible about your image or file. This will help the users understand what is being displayed, though it will also help the search engines determine what is on the image, but also to determine the topic of surrounding text. Search Engines like Google therefore place a high value on Alt Tags and this ultimately will assist in the search engines indexing your page.

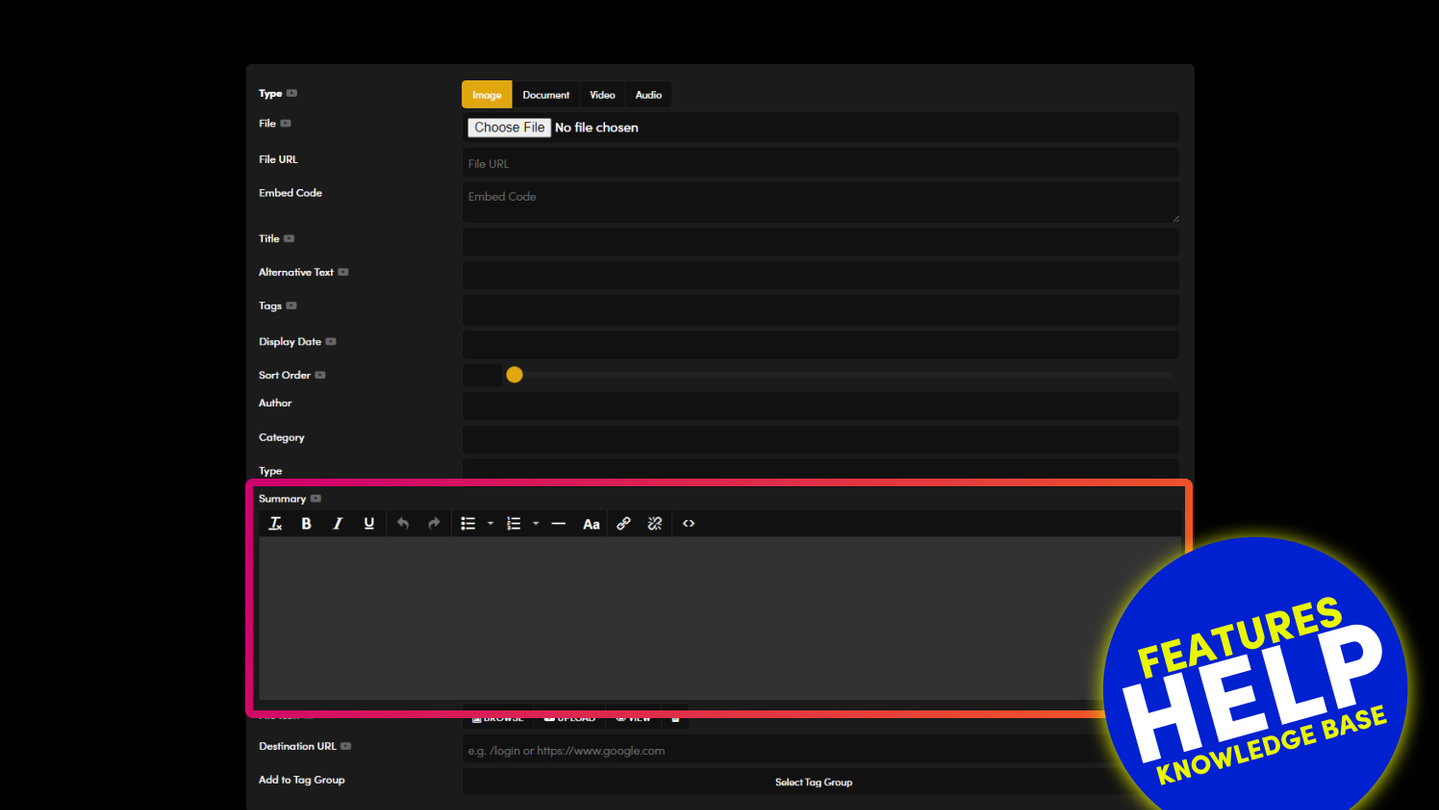
SUMMARY
In widget feeds such as Galleries and Documents, you can also display a text summary of the file. This lets users know a little bit more about the page before they click to view the full file.
The widget summary will display 140 characters or less, which is the same size of Tweet.

DESTINATION URL
File Destination URL links your file to a page.
This will be the default link when the user clicks on your file, unless it is overridden in the pages area or by a widget.
FORMAT:
Use the following format:
- http://www.domain-name.com/page-name

RELATED HELP
PRICING PLANS
MINI
12 PAGES
70 AI THEMES
5,000 AI LAYOUTS
90 MINUTE CHALLENGE
5 DAY CHALLENGE
WEBSITE BUILDER
CMS
BUG FREE MAINTENANCE
ONLINE SHOP
AI HELP ASSISTANT
AI COPY ASSISTANT
AI PHOTO ASSISTANT
AI AGENTS
AI AUTOMATION
AI CHATBOTS | Unlimited
AI VOICEBOTS | 5 Agents
AI VOICEBOTS | $0.08 min
AI VOICEBOTS | Calendar Bookings
PLUS
50 PAGES
70 AI THEMES
5,000 AI LAYOUTS
90 MINUTE CHALLENGE
5 DAY CHALLENGE
WEBSITE BUILDER
CMS
BUG FREE MAINTENANCE
ONLINE SHOP
AI HELP ASSISTANT
AI COPY ASSISTANT
AI PHOTO ASSISTANT
AI AGENTS
AI AUTOMATION
AI CHATBOTS
AI VOICEBOTS | 5 Agents
AI VOICEBOTS | $0.08 min
AI VOICEBOTS | Calendar Bookings
PRO
500 PAGES
70 AI THEMES
5,000 AI LAYOUTS
90 MINUTE CHALLENGE
5 DAY CHALLENGE
WEBSITE BUILDER
CMS
BUG FREE MAINTENANCE
ONLINE SHOP
AI HELP ASSISTANT
AI COPY ASSISTANT
AI PHOTO ASSISTANT
AI AGENTS
AI AUTOMATION
AI CHATBOTS
AI VOICEBOTS | 10 Agents
AI VOICEBOTS | $0.08 min
AI VOICEBOTS | Calendar Bookings
ELITE
UNLIMITED PAGES
70 AI THEMES
5,000 AI LAYOUTS
90 MINUTE CHALLENGE
5 DAY CHALLENGE
WEBSITE BUILDER
CMS
BUG FREE MAINTENANCE
ONLINE SHOP
AI HELP ASSISTANT
AI COPY ASSISTANT
AI PHOTO ASSISTANT
AI AGENTS
AI AUTOMATION
AI CHATBOTS
AI VOICEBOTS | 15 Agents
AI VOICEBOTS | $0.08 min
AI VOICEBOTS | Calendar Bookings
AI AGENCY
40% PLATFORM PAYOUT
100% SERVICES YOU SELL
AGENCY SITE ($199 ELITE PLAN)
PARTNER LICENSE
MY SALES DASHBOARD
MY CLIENTS DASHBOARD
LOGIN TO CLIENT SITES
STAFF PERMISSIONS
TEAM LAYOUTS
NORMALLY $199 /month
PROMO $99 /month
PARTNERS & INTEGRATIONS
70 Award
Winning AI Themes
GETTING AROUND
SUPPORT
AI SALES LINE
AI SUPPORT LINE
GET A QUOTE
A Web Builder for Design. A CMS for Business. We serve all businesses from SME's to Enterprise. Talk with us for AI development, custom website design, website development, ecommerce websites, directories, intranets and social networks.


